Showing posts with label baby shower gifts. Show all posts

Thursday, July 5, 2012

Carseat Canopy


        There is something wrong with me. seriously. I wanted to get this sewn before I had Carli, so I started and finished this Thursday and I had her Friday. I'm nuts!

       The zebra print is a bit much, but it was cheap at walmart and I only a little left of the animal print after doing the carseat recovering and diaper bag. I had black fabric that was pretty much free that I purchased from a garage sale last summer. I used that for the inside.


I purchased this AWESOME pattern from:

It is worth every penny! I'll tell you why!


 The canopy is extra long in the front and back and sides. The last one I had barely covered her feet in the front and it was always flying up in the wind. 
The back also has this awesome bustle that you can snap up and let the baby get some air without exposing her to sun and stuff. I'm still overwhelmed by zebra print. I really wish I would have gone with something not so loud.

The front has a zipper that you can open to see her, or give her some air and still block the sun while still allowing you to use the handle to cary her. I love the girly ruffle detail or you can do a less girly piping detail.
Inside there are 2 convenient toy loops that I always wished others had. They are placed right below the straps used to attatch the cover to the carseat.

            All these combined make for a very user friendly and cute canopy that baby can sleep comfortably under.


           While making this, I was so rushed that I didn't take my time to read instructions carefully and am used to patterns with a ton of step by step pictures. This pattern is a lot more like the patterns you purchase in the store. If I would have slowed down I would not have gotten frustrated during the zipper/front and back assembly process. AND I should know better than to cut the zipper short before the thing is done. SO DUMB!!!! that lead to a lot of safety pinning and taping to make sure it stayed the way it was supposed to before completion. I ended up adding a lot more time than needed and using my seam ripper way more than I like to just because I hurried. ANYWAY, it turned out fine and works! again, not perfect, but nothing of mine ever is. :)


Wednesday, May 9, 2012

EASY Hooded Towel Tutorial

Again, I apologize for the terrible pictres. I'm using an old camera until I can afford a new one. This little stink bug broke my last one. Also, forgive the mess. I'm in the process of moving baby stuff in and sewing stuff out of this room. Big job!


Materials needed:
bath towel
hand towel
thread
sewing machine

Step 1: fold hand towel in half like a hamburger bun. place it on your child's head and see how far you want it to cover their face or come past their forehead. I didn't do this the first time and had to make some adjustments. My daughter is almost 3 and she still has room to grow with this one. I ended up cutting 6 inches off the side.

Step 2: with right sides together (meaning on a towel... the finished edging you want showing outside is the right side)  stitch up cut edge at 1/4 inch and then either serge or zig zag the edges.
After I bought these I realized one side would be different than the other side of the hood. oh well! they were cheap! (on the pink towel I also cut about an inch off the bottom just because I didn't want it super long. not necessary.

Step 3: find the center of the main towel by folding in half and placing a pin. Match up center of main towel to seam on hood. With right sides of hood and main towel together, stitch at 1/4 inch.
ALL DONE!


Friday, March 2, 2012

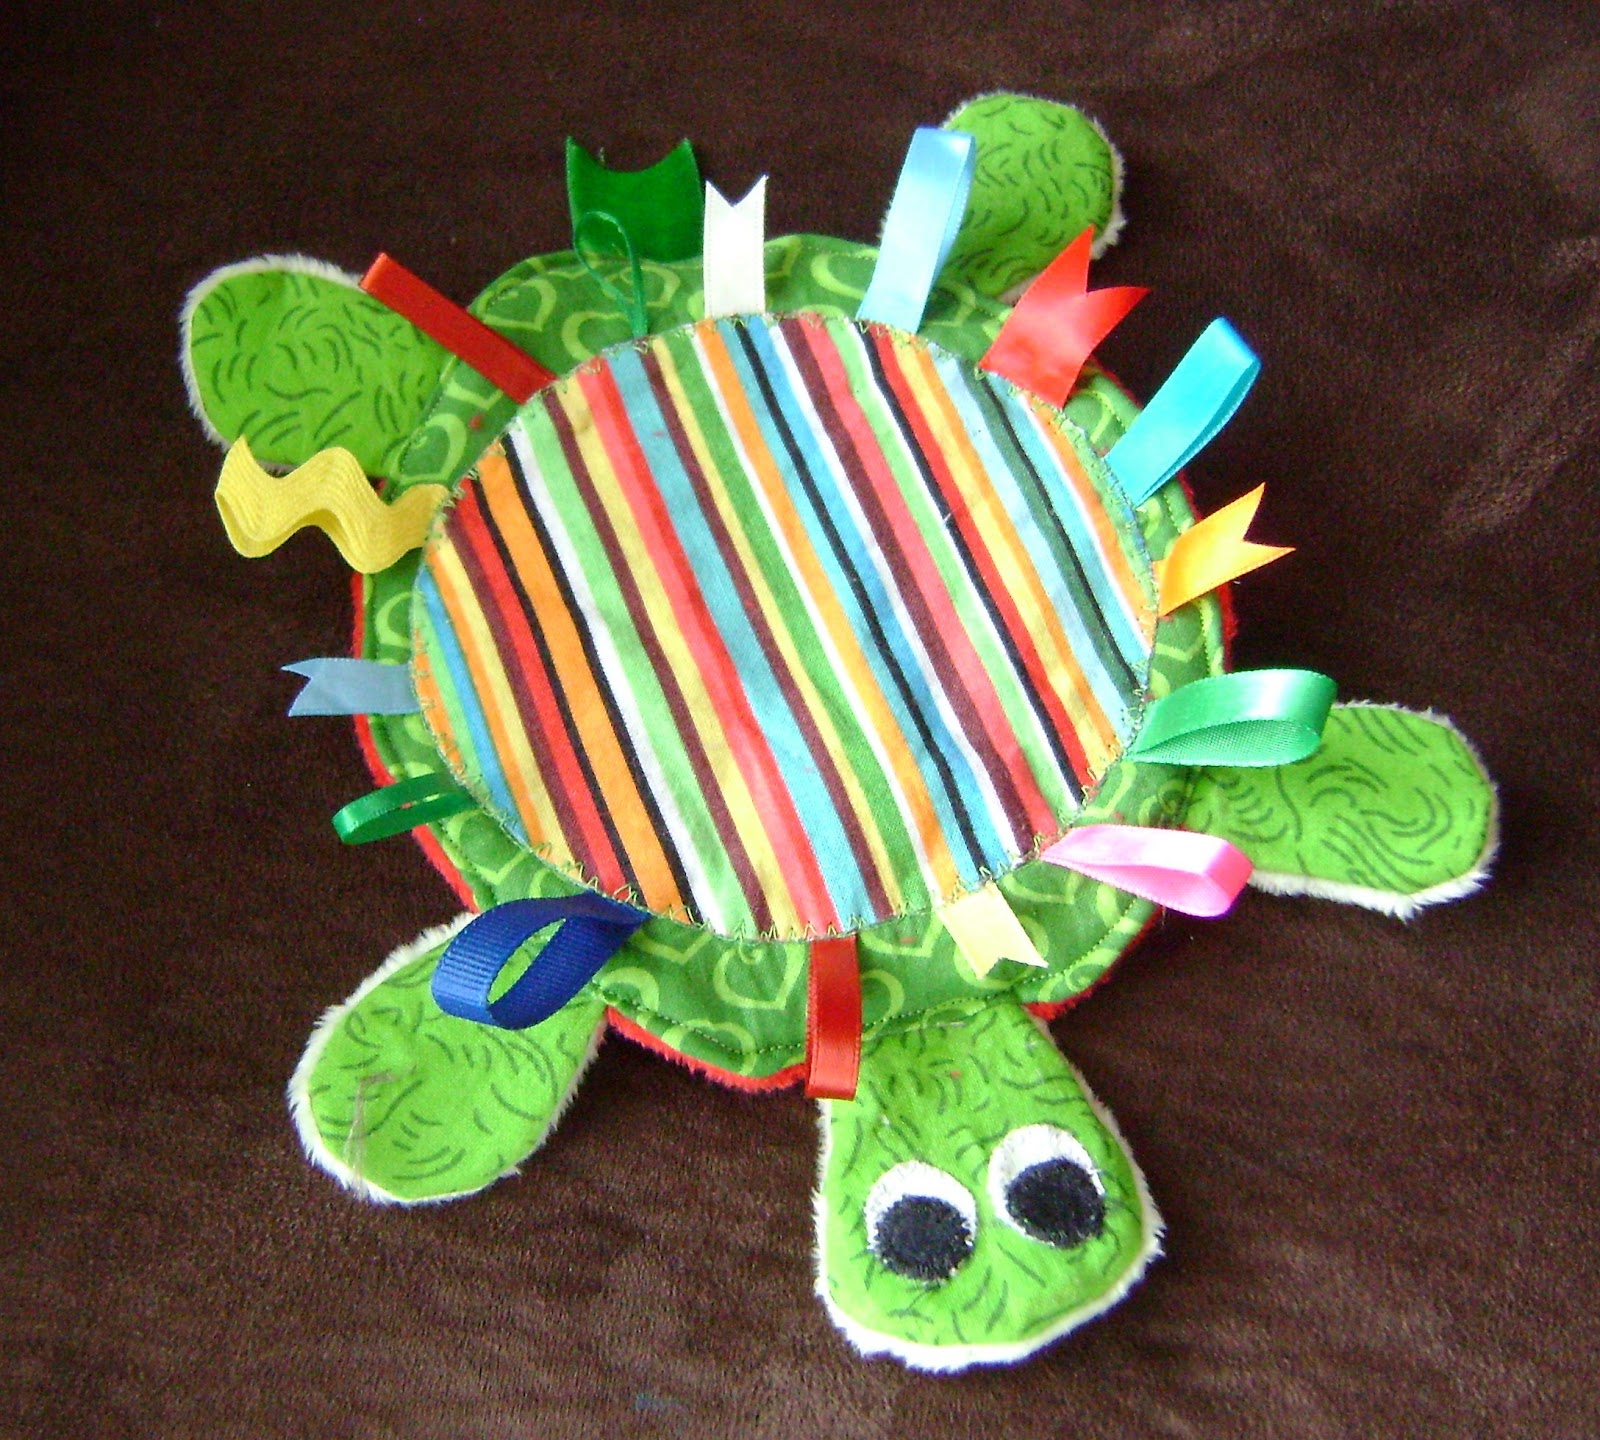
Crinkle Turtle


                I saw a tutle like this for sale but didn't feel the need to spend the money on it. So, as usual, I made it myself. :) I just drew out a tutrle on paper and started working away cutting fabric to work.

If you want to buy one this is where I saw it for sale: http://www.etsy.com/listing/69190537/yertle-the-turtle-green-or-pink-crinkle

I used a plastic bag for under the shell and in the feet and head I used an old wipe bag (the kind people use for refills).  I added skinny batting to the head and body and left the feet alone.  I appliqued on the shell: first added head and bond to the shell fabric, peeled off the paper backing and started pinning in place with ribbon under the edges. I zig zaged it down then ironed the shell to make it stick down good. :)

I guess I should have taken pictures of it as I went along, but I didn't.  Anyway, this project is very simple and fun! It turned out cute! :) On the tummy of the turtle I used red minky.

Thursday, March 1, 2012

Baby Blocks


I made these with my scraps of fabric tonight really quickly. 
One block is made from 4" squares and the other is made from 5" squares.  I added ribbon tags everywhere I could and used flannel, cotton, minky and chenille to add different textures.


THE BEST Burp Rags and Bibs


        As I mentioned in an earlier post, my daughter Keira was born with acid reflux. If you've never seen a child with it, it's gross.  She threw up all day every day until she was 1 1/2. It was projectile vomit and often times covered the person holding her, the floor and any nearby furniture. She would go through multiple outfits a day because she would stink so bad and had 2 baths a day. She was on medication but it didn't help with the throwing up part, just the buring part. She is such a sweet girl though, I couldn't help but love her even though she was gross. :)
       
     With that in mind, preparing for my next daughter I wanted to have a lot of good burp rags on hand. My other burp rags are rough now and faded and honestly didn't do a whole lot for cleaning up puke.   She would go through a whole stack in a day. I read online different types of tutorials and honestly wasn't impressed.  Most would say things like you need to buy a package of Gerber cloth diapers but don't buy them from walmart because they come from China. You need to buy them from Target.  We don't have a target and the cloth diapers alone cost $13.00 for 8 of them.  I looked at the Walmart kind and they are more cheesecloth than diapers. so I had another idea!!!!
      
       At Joanns WITHOUT a coupon you can buy chenille for $14.00 a yard.  With a yard of fabric you can make a good dozen burp rags. I used scrap fabric or bought end of bolt deals or I found cute fabric and bought 11 inches of it.  (that usually came out to be about $1.45 per fabric. with 11 inches you can make 2 burp rags)  NOTE: pre wash your chenille and fabric and dry it before using it!!! I prewash everything I use besides minkee and it blows my mind when people don't because you end up with a messed up product in the end if you don't. 

   
The dimensions of rectangles you need of chenille and cotton or flannel are:
9 1/2" wide and 17" long
  • I use a rotary cutter and mat to make sure my pieces are square.  Also, I often times find the measurements and tear the fabric (don't tear chenille- it won't be straight)  because it stays with the right dimensions.
  • once my rectangles are cut, place them right sides together and pin. 
  • Sew around them at a 1/4" leaving about a 2 1/2" opening and clip corners
  • Turn right sides out through the opening
  • use the tip of a pencil or your scisors to carefully make sure the corners are poked out.
  • now top stitch a little less than 1/4" around the burp rag  making sure the opening is tucked in to be flush with the rest of the burp rag.
  • YOU'RE DONE!
I could make these all day. they are fast and easy and turn out so nice and will be AMAZING to use. And oh so absorbant and soft for baby to lay her head on! :)


BIBS:


For the bibs I used a bib I liked when Keira was using them and traced around it adding 1/4" for seam allowance. 

  • cut one out of fabric (cotton or flannel)
  • one out of chenille or minkee. 
  • Place right sides together and pin
  • Sew around the entire bib leaving an opening in the bottom for turning
  • Clip corners, neckline and curved edges
  • turn inside out
  • topstitch at a little less than 1/4" (again to avoid having to hand sew-you may want to anyway)
  • attatch velcro
  • YOU'RE DONE!
Easy and cute!  I used these all the time and I would have made more but I ran out of chenille and minkee.  :)