
DIAPER BAG FOR ME!!
My camera flash is weird right now so i'm sorry that the pictures aren't the greatest. I have wanted a new diaper bag for a LONG time. I made my first bag before my daughter was born and I played it toatally safe. It is black and I went completely by the pattern. It turned out floppy and EVERYTHNG showed up on the black. HATED it. I did however like the pattern to some degree so this time around I changed it up and added things to it to make it how I want it. for this bag I used Simplicity 2924. I finished this bag from start to finish in two days. It would have gone a lot faster if I wasn't held up by my non working sewing machine and huge mess that happens every time I sew.

For the outside front I made up a cute onesie and appliqued it to the front and sewed buttons and a bow on. I found some fabrics I like that went with the pink and stitched them on too. I wanted an applique because it helps hold the flap together and make it more sturdy. I also used fusible interfacing for the lining side too. The pattern does not call for that. I USED FUSIBLE INTERFACING ON THE ENTIRE LINING OF THE BAG. I also used fusible fleece on both parts of the strap.

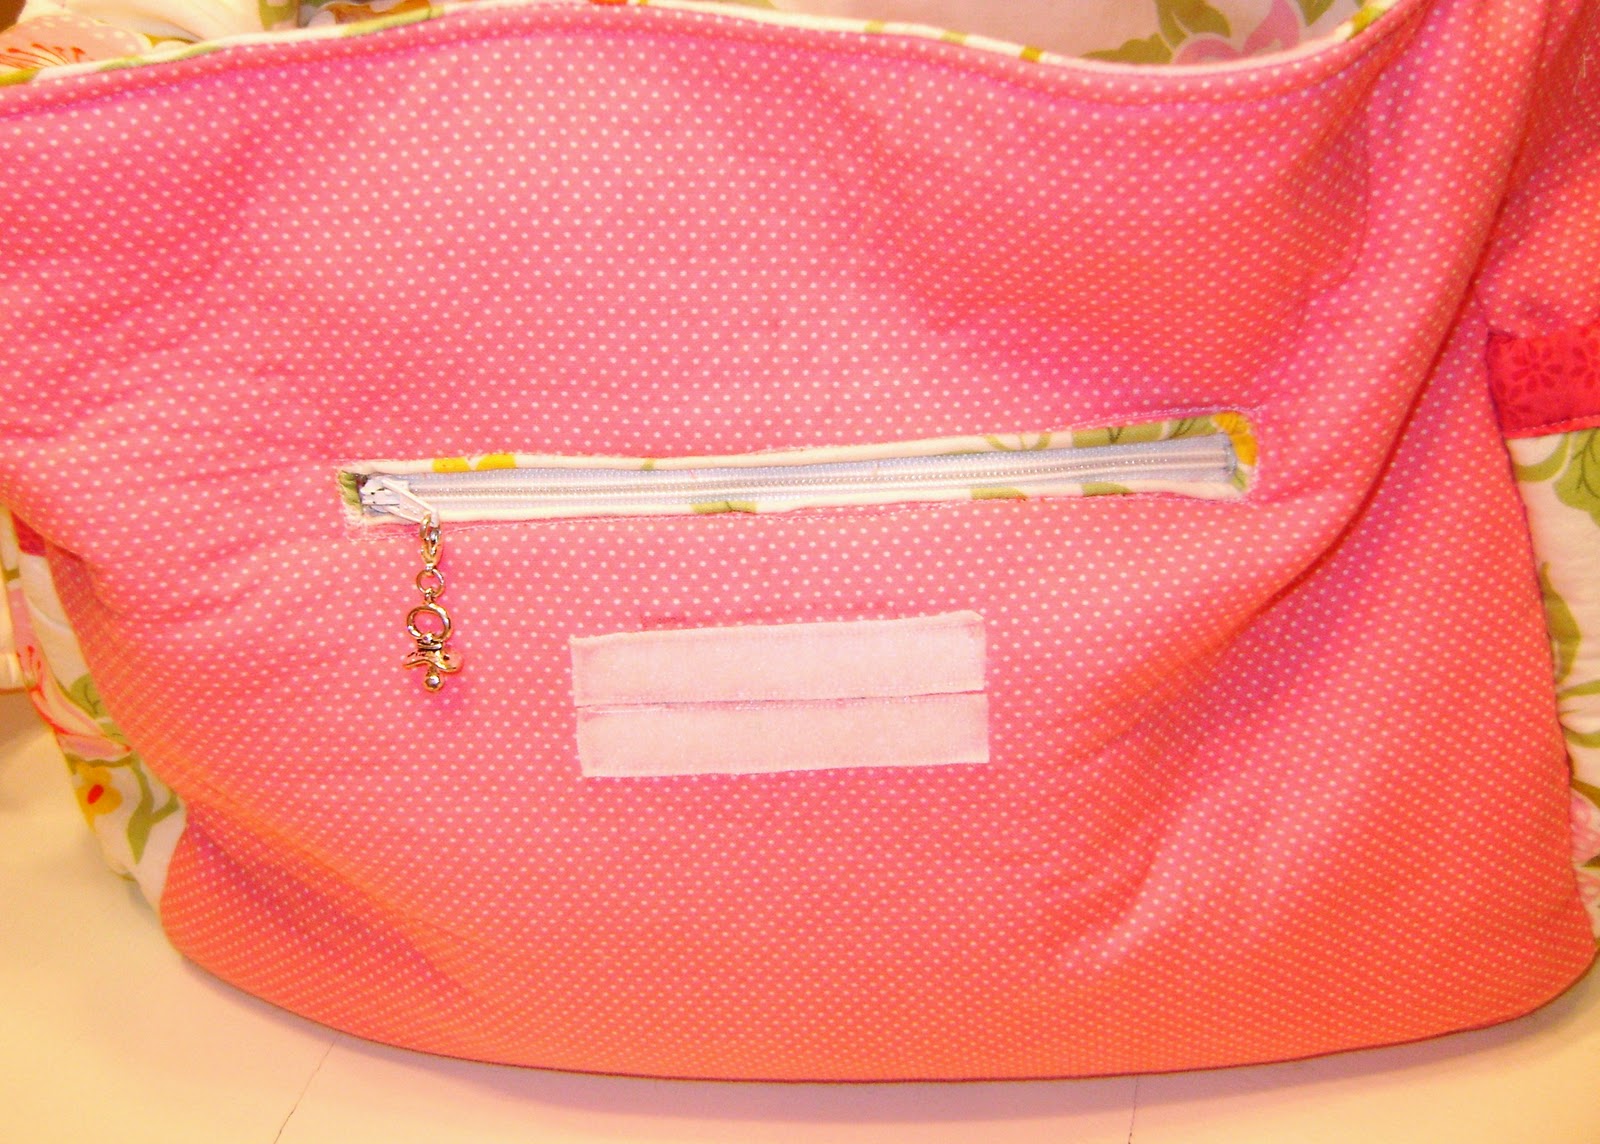
The back pocket of this bag I used a bigger onesie and appliqued it on as well as using an additional layer of interfacing to the lining. I pretty much did that to the entire bag. Along the top of the pocket I made my own bias tape and stitched it along the top. Because of this, I cut about an inch off of the top of each pocket piece and did my own thing.

For the sides of the bag I stitched a heart above the pocket and again did my own thing using the bias tape on the pocket. I also used fusible fleece on the pocket to make it more absorbant if there was leaks and also add to the sturdiness of the bag. I could have probably just used interfacing and been ok but what the heck.. go big or go home right? :)


Ta dah!! My bag is finished and I love it!
SELF BINDING BLANKET OUT OF SCRAPS

My daughter loves (minkee or minkey I have seen it spelled both ways) and while I was making my projects with minkee for the patterns, she would take the big piece with her all over the house. I figured she needed a blanket. I found some reminant of the purple animal fabric and cut it into equal squares and I had some purple check fabric from my grandma's stash I used. the minkee scraps I used where I could and the back is all minkee. I can't do a nice binding to save my life so i pulled out old instructions I had from Porter's in Rexburg and kindof followed them. my fabric dimensions are not the same as the instructions so it didn't work the same. Anyway then I machine stitched around each square. she loves it.
LITTLE GIRL DIRESSES

The jumper on the right is made from Simplicity 2672. It was a "it's so easy" pattern and it really was. It's stinking cute and looks comfortable too. The dress on the left is a Butterick B4110 pattern. I hated this pattern when I used it the first time. It was explained pretty dumb when it came to the back yolk in my opinion, but once you figure it out once, it's pretty easy the next time.


http://www.etsy.com/shop/winterpeach?ref=seller_info This pattern was very simple to make although when I finished it I was a little disappointed because it didn't look the same as hers. I also thought the piece that holds the head to the body was a little bit of an eye sore. I'm honestly not sure how I would have done it differently. What I did to make it look a little better was I hand stitched the back part of the ear to the head a little bit with a few small gathers in it paralell to the head making the ears stand straight up and the neck piece I made a few gathers in it too with a needle and thread. If I would have read ahead a little, I would have placed big snaps with a snap gun into the drawstring piece before I sewed it together and also in the head. This has you sew small ones on after it's all done. I finished it by sewing a little bow on to the ear for looks. It is cute, but not all that functional. I still would have made it again just because it's cute and I put stuff in it and hang it from her closet door knob. :)


http://www.etsy.com/listing/62125487/diy-make-your-own-longalls-or-shortalls it says it's for boys but it's easy to make for girls and it's got tons of sizes in it. p.s. my daughter was such a good sport for this picture she was feeling very sick that day (poor thing) and she still put up with me.
HALLOWEEN COSTUME

My daughter was a fairy princess for Halloween this year. She was so cute in my opinion and there wasn't a costume like hers anywhere. This star is made from felt with batting in between and a hot glue dowel wrapped in ribbon. I tied on ribbons and curled them... or tried. I made ribbon roses and stitched them on both sides and had yarn stitched around the outside for looks. Then I glitter glued the heck out of it.


http://www.etsy.com/listing/62613390/bella-baby-crib-shoes-diy-do-it-yourself (I have bought a few patterns from her and she makes and awesome pattern with a ton to choose from) I used my husband's old carharts for the soles and used puffy fabric paint to draw designs on the bottom to add grip. for the inside I used white satin from an old wedding dress scrap and the outside is the silky fabric i used for the skirt. I made the insole out of fur and trimmed it with the same ribbon used elsewhere.

I made this headband by using stretchy lace and felt 3d crown that was stitched together around the top and stuffed with stuffing then stitched down around the bottom to the lace by machine. I glued some pearls on and hand stitched the bow and rose on the bottom.


STELLA DOLL CLOTHES

I'm working on a pattern for doll clothes for the Stella doll. UGH. let's just say I've taken a break because I was losing sleep over it. NOT WORTH IT.


RANDOM STUFF from a long time ago


 the dress on the left is an old shirt of mine.
 One of my first projects where I cut pants off and added a ruffle.


Tutu and I took an shirt from the D.I. and made it smaller


