Tuesday, September 25, 2012

Mommy and Me


2 dresses and a skirt in 2 days. Phew!
                 I saw this fabric and fell in love. I don't really know why because I've never been a fan of this mustardy yellow color.  it just looks awesome with the grey though and the pretty feminine flowers drew me in. I hate sewing for myself because i'm such a mean judge of my own stuff and of the way it looks on me when i'm done. Needless to say, i'm somewhat disappointed in the way the skirt turned out, but that's just me being me.

            Yesterday afternoon I started sewing on the skirt and finished it first thing this morning.  I fell in love with this skirt on etsy and HAD to have one, but just couldn't spend that on a skirt I could make myself.  that sounds horrible, and I totally hate when people do that to me, but I sew. I sew everything, so I just hate having someone else do it for me.

            Mine ended up having too many pleats/gathers than this one so it adds to the bulky look in the butt and front area i'm not a fan of, but I guess i'll just have to skinny up at the gym to solve that problem! :) it's way comfy and I like it other than that. :) I'm sure the person selling them on etsy did a way better job making it fit than I did.  I just sorta winged it and she has had a lot of practice and trial and error i'm sure to make hers as awesome as it looks. mine is just not quite there. looking at her pictures again, i'm sure I didn't do the bottom and top sections as wide as I should have either. that's enough of criticizing my work though!
UPDATE:
I ended up fixing the top by taking it apart and adding a whole separate casing to the top instead of folding the existing fabric over to make the casing. this added about 2" to the top and now it fits in the right place and feels much more attractive to wear.  I don't know if it's the most cute skirt I've ever worn, but it's so comfy and I don't have to worry the whole time i'm wearing it that it's riding up or showing stuff it shouldn't. There weren't too many pleats and everything turned out just right.  I LOVE IT! 

don't mind the elastic! it was pre completion! :) also remember I had a baby 3 months ago. SUCK IT IN! 


         One positive thing I did learn is how to do this awesome new thing called a Flat Fell Seam.  I found the instructions online and went to work.  It was way easier than I thought it would be and I love that you can find instructions on the internet for everything. :) oh yeah, and if you have gathers on the skirt like this one, you don't need to MAKE an A Line, the gathers make it for you, so your fabric just needs to be straight. Learned that the hard way. 

           I don't have a serger or anything like a fancy sewing machine.  Just my trusty old Kenmore that my dad bought at a garage sale when I was in high school and fixed up for me. That thing has taken a beating and still works like a charm.  Yes, I do wish I had a fancy new sewing machine and serger, but I make due and look how nice things still turn out. 


Good enough for me! 

        My next project was 2 dresses for my girls with the left over fabric. I used the pattern from Little Lizard King to make them and I LOVE how cute and simple and comfortable they look. I did these both after lunch. 

    This one is my 3 month old's dress. I made it in the smallest size I could (6-12 month) so it will be big on her but i'm not worried.  She is a chunk! :) I love the 3/4 length sleeves and the fabric.  I wish I would have bought a little more of the sleeve fabric.  I used it all up on this little dress.  I only got a 1/4 yard. 

         The fun thing about these sleeves is the elastic in the inside.  No casing needed and you can use a fun zig zag to put it in place.

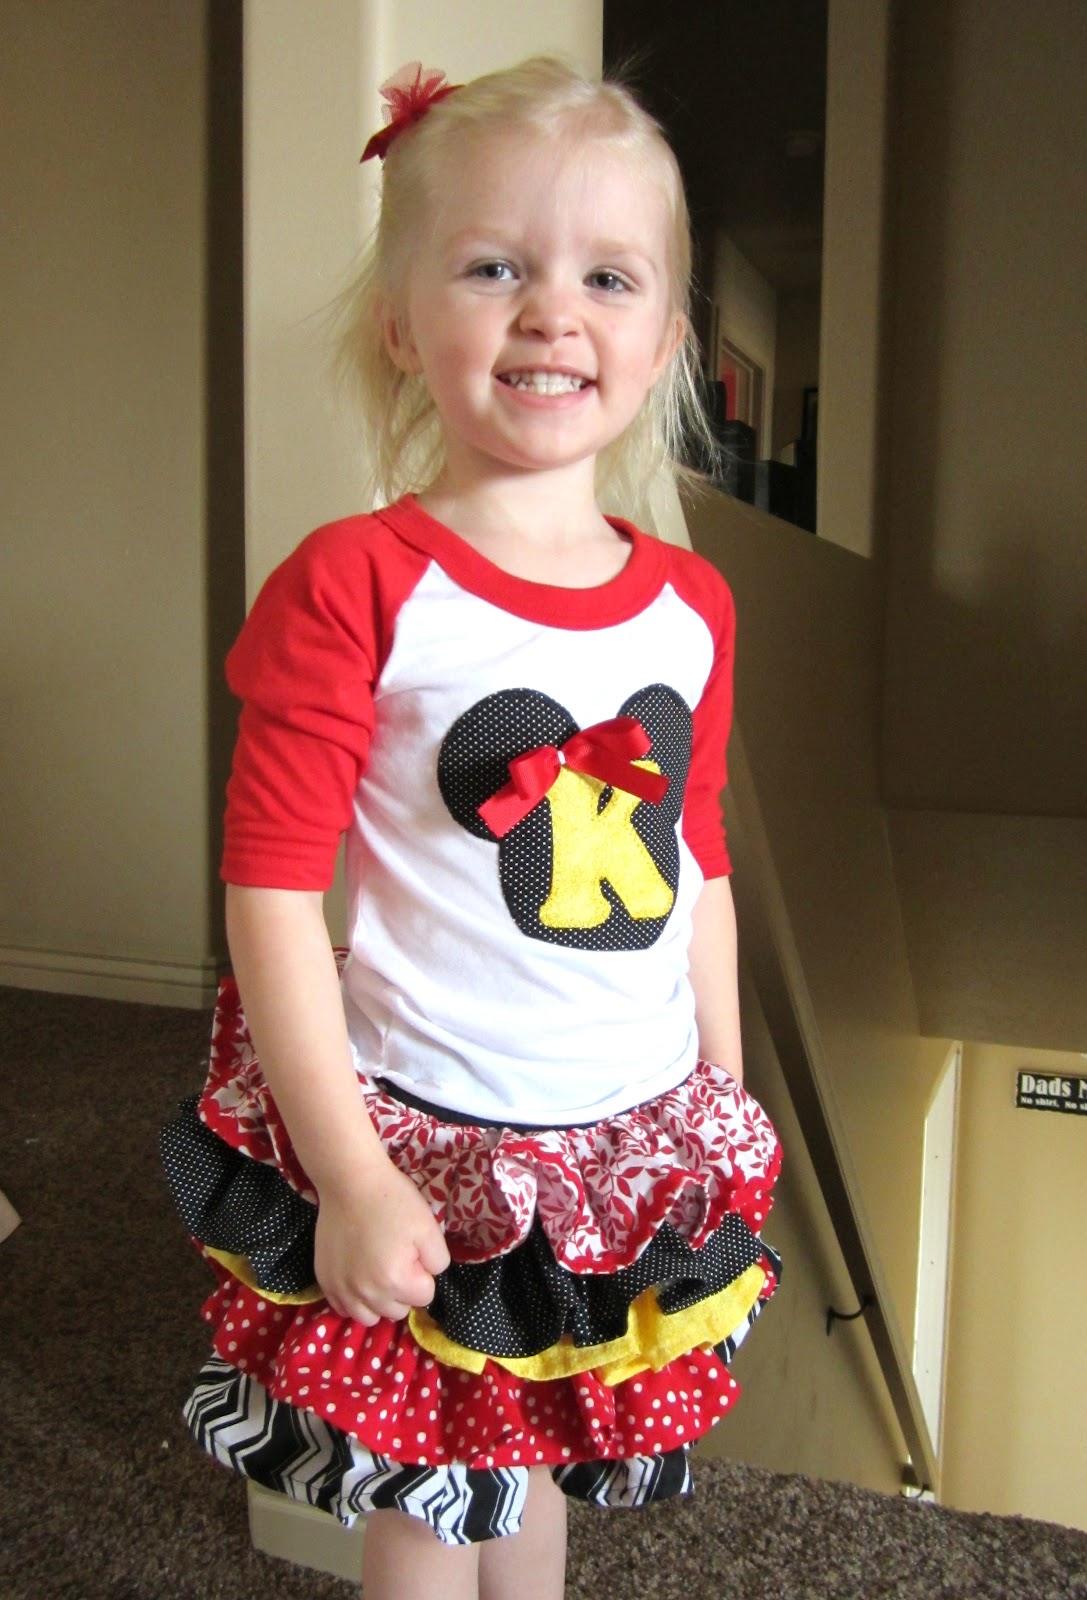
              The next dress is my 3 year old's dress. She loves pockets and kept saying "I love your skirt Mommy" and "I love your pocket!" "Can you make me a skirt?"  I couldn't resist putting little pockets on it.   

I'm always blown away by what pretty girls I have!!! :) She even did this little pose on her own.  


Friday, September 21, 2012

Ruffle Skirt... aka the intolerable headache


           I'm half tempted to say "don't try this at home!" The reason this skirt was such a headache is because I used my seam ripper more in two days working on this than I have all year on every other project combined!!!! I wanted to throw it outside and lock the door a few times. it was a nightmare!!! 
      
            Before I started I read a few blogs explaining how to do it and some left me kind of confused because I tried to follow their exact measurements and things.  It just wasn't working.  I ended up winging it and paid for it for two days. grr. 

            IF I were to ever do this skirt again, I would do these measurements: 
  •                       make each strip 4x78 
                               (for a 3 year old- if it is a bigger child do about 2 1/2 times the width)
  •                       space them about 1 1/2" apart
  •                       The underskirt is still a mystery to me.  It needs to be almost more of an A line.  I'd go 4  inches maybe bigger than the waist and flare out a little from there. 

I ended up using an old tshirt for the underskirt and sewed them all to it, but it would be almost easier to make the underskirt in strips and then sew the strips together.  I don't know how many times I had to stop, turn it over and see the underskirt kept sneaking up under the needle where it wasn't supposed to be and I had to undo it all and start over. so annoying!!!


  •   cut your strips and sew them right sides together on the ends.  I just ended up buying 1/4 yards of fabric and tearing the fabric every 4 inches once I straightened the fabric out.  If you buy fat quarters you will have to sew many smaller strips together and it will take longer and be more confusing to get the ruffle spread out evenly. 
  • once fabric is sewn together iron over the edge 1/4" and repeat.  sew it down along the edge. 


  • Baste along the other edge.  stop about 1/4 of the way along and cut your threads long, start from there again. do that the whole way around.  
  • Pin your piece on your underskirt in fourths.  centering the side seams and middle where you should have stopped and started a new baste line.  Pull your threads to ruffle each section and spread it evenly.  pin in place. do your first ruffle right along the bottom. 
you can see in the picture at the top I made a casing for the elastic already but I'm not 100% sure it was a good idea or not.  I ended up moving it down later anyway.  I should have waited.  
  • once it is all sewn down, zig zag the raw edges down and flip ruffle down.  I like my ruffles to lay down a bit and not stick out to show the underskirt so bad, so I top stitched the ruffle. 
               I did 5 ruffles and added a lining to mine so you wouldn't see the ugly stitching underneath. 

               It was all a miserable experience and I know there has to be an easier way to make this skirt.  It doesn't help that I'm tired, and I can't sew like I used to anymore.  I have to stop to nurse a baby, change diapers, snuggle, make meals.  I might have to think more on this skirt and figure out a way to make this look awesome.  

              I spaced my ruffles out every 2 inches or so and it was too long, so I sewed them closer at one point and it looked adorable!! only problem is I put in on her and it looked like a mini skirt. I couldn't get the spacing right and it still bothers me.  I cut it all apart after that and sewed on strips to sew it together and it ended up spaced like It did to start with.  AAAAHHHHA!!! SO, I took a needle and thread and ended up taking up a few ruffles by hand to make it a little shorter.  now it is at about the knee and it still doesn't look quite as cute as I'd hoped.  OH WELL!!!! I can't take anymore of this skirt! 

I added a cute bow to the back inside so she would know which way to put it on. 

and I made a diaper cover.  Ok, I bought some blanks online from ebay because making them is a pain. and I never have the extra fabric to make one.  I did applique on the Minnie Mouse head and bow. (I bought 6 blanks in different sizes for 10.00 including shipping.  People charge 12.00-14.00 for one just like this on etsy) 

I wish I would have made the skirt more of an A line like I mentioned earlier because I had to pull a bit to get the skirt up high enough to even see the applique. sigh.

        I found a baseball shirt and did a cute applique on it also.  It reminded me of when I was a kid.  Shirts "like" this, only not as cute, were really popular.  :) This shirt however was way too big, so the first thing I had to do was take it in and make it fit her. another extra thing I had not intended on. 


If you can see, I added a ric rac trim on the top ruffle to make the red pop more. 

Even though I have some SERIOUS regrets with this skirt, it turned out cute enough that she likes it and she could wear it in public and I won't be embarrassed.  :)

This is supposed to be a birthday gift for her, but with all the trying on the skirt and stuff, I don't know if I can wait.  she has already seen it right? not like it would really be a secret. 

I have said it before, but I feel all I do is copy other people.  I see ideas I like and think I can make that!!! I found this one here
it is $50.00 for the whole outfit, and after everything I just went though, it would have been WAY worth it to just buy one. :) If I had a surger, and a new sewing machine that had a ruffler foot this would have been cake. but I don't, so I make due.  It like those new appliance commercials for LG or whatever that say is it a 20 min faster wash cycle or a 20 min laugh cycle or something. talking about how you can spend more time with your kids rather than doing laundry or dishes.  Kinda the same concept for me.  Yeah, she doesn't NEED clothes like this, like you would NEED to cook and do laundry, but you get the idea. 


Tuesday, September 18, 2012

Minnie Mouse Halloween Costume

     Right now my 3 year old loves Mickey Mouse Clubhouse! :) I thought for Halloween she could be Minnie Mouse and it would be pretty simple to make.  I received a pattern from Little Lizard King and I LOVE IT!!!

You can find the exact pattern HERE.

     This pattern was simple, so easy and the pattern piece was the best part.  You only have to use this tiny pattern piece to cut out the arm hole rather than the whole top. BRILLIANT!  It has options for different sleeves and bottom of dress. I plan on making a few more of these asap with different sleeves. This dress is so fun.  PLUS it runs true to size.  I made a 4t because with other patterns for this type dress they always fit super small on her and she is already super skinny. This dress turned out a little big because I planned for it fitting tight. I would TOTALLY buy this pattern readers! it's a basic pattern everyone can use and has so many options to make it your own. It would be great for someone learning to sew too! :)

I added a tie to add some Minnie Mouse character and to help it fit better because I made it extra big. 

I've had tops like this before that I've done ties for and they just end up slipping off or falling down all day. I decided to sew it on to the dress in the front just a little. I didn't go all the way across because it would look funny with the gathers and pleats that are naturally made. This will just hold it in place enough and keep the fabric from folding over and bunching up. It works great! 
don't mind the sloppy bow. I was in a hurry. :) 


do you think she likes it a little? 

I'm having my friend from Crafting Friends make this hat for me to go with it: 


Now all she needs is some white gloves and she's ready to go Trick or Treating! :) 

I love this little girl! She always has crazy hair, a princess dress on, and a bow she puts in herself. She is going to love this costume and I love that I can make her smile just by doing something I love to do for her. It makes me feel good. I may not be the best mom all the time and I constantly get frustrated with the tantrums and whining, but sewing for her makes me feel like I can do something right for her. 

UPDATE:


Happy Halloween!


Ruffle Butt Onesies

    For my daughter's Halloween costume I decided she would be a little calf.  I feel like a cow and all she does is drink milk and cry, so it fits. :) plus the costume is adorable.  I feel like all I do is copy other people's ideas because I don't want to pay the price to have someone else make something I could make myself If I put in a little time and energy.  This is the outfit on etsy for sale:

http://www.etsy.com/listing/108671376/cow-belle-rufflebum-halloween-costume?ref=sr_gallery_13&ga_search_query=halloween+costume&ga_view_type=gallery&ga_ship_to=ZZ&ga_min=0&ga_max=0&ga_search_type=all&fb_source=message

My friend from Crafting Friends is making the hat to go with it:    http://www.facebook.com/pages/Crafting-Friends/180595232008676?ref=ts

I also ordered cow print leggings off of ebay for about 5.00. everyone else wanted to sell them for double that.  I'm ordering from China.  It will take longer to get here, but it was free shipping and i'm good with that. It's a good thing I'm prepared. :)

This is the onesie I finished today:


The ruffles took me forever! probably because I had a busy day of being a mom involved there, and my sewing machine was acting up again.  I still think it turned out great! 

I grabbed the wrong kind of heat and bond in the store and the package says not to sew.  I sewed it anyway. I didn't see any problems with it.  Come to think of it, maybe that is why my sewing machine is acting up. Guess it's time to clean my machine. 

     I also wanted to make a zebra print onesie for my baby to wear whenever.  The ruffles on the butt of this one turned out interesting.  I'll explain in a min. 


.
This is the interesting part.  I wanted to try this a little different than the ones above.  I zig zagged the edges, opened up the onesie side seam to tuck the ends inside and stitch it closed. The pink turned out cute, but I couldn't get the zebra stripe sot work right.  When I was sewing this, like everything else I made, I winged it all.  I didn't measure strips and because I just eyeballed it, the strip was too big and not ruffly enough to be anything but a stip really.   I was using scraps left over from the canopy I did earlier and I didn't have much at all left.  I tried to sew on pink ribbon in the middle of it, I tried pink ruffly headband material, I tried a pink zigzag stitch to make it more interesting. I hated them all.  I ended up getting another strip and making a tiny ruffle.  The bad thing is the stripes were running the other way and it didn't change the look much.  OH WELL!! don't I say that a lot?! lets just say, it will have to do because I'm done.  after working on this all day and having a screaming baby and a trouble maker daughter I should be thankful it turned out as good as it did. I'm done looking at onesies for a while now. NEXT! 


Wednesday, September 5, 2012

A day of firsts: monkey pants, doll clothes and t-shirt

I recently bought this pattern for "monkey butt pants" and wanted to try it out, but I have never sewn with knit before.  
   www.etsy.com/listing/91287677/monkey-pants-pattern-3m-24m

   so, I thought before I spend money on fabric, i'd try them out with an old t-shirt. I have my favorite shirt my husband brought me from Alaska, but it's falling apart around the logo on the back, so I thought i'd use the usable fabric to make some cute pants. and BOY did they turn out cute!


    I also recently picked up some cabbage patch dolls from an online classifieds page and needed some new clothes for them all to wear. .. along with the current dolls at our house. We now have quite a few. :) I found this tutorial and I couldn't resist!

 http://obsessivelystitching.blogspot.com/2009/12/baby-onesie-into-doll-onesie.html

http://obsessivelystitching.blogspot.com/2009/06/baby-clothes-to-doll-clothes-tutorial.html

These are what I came up with: 


(This girl loves her babies!! Crazy hair from the bath! :) a very common occurrence at our house)

         This doll is for Carli when she gets old enough to play with it.  Keira will share her others too, but this will be just hers, like Keira has one that is just hers. 
             
        This outfit is one that Carli wore and I loved it. It was a onesie, but this was the last outfit I did, and I got lazy.  the bottom part looked complicated and I didn't have patience. Plus, I was afraid The girls would wake up any moment.
         
          If any of you are scared to do these yourselves, don't be.  just wing it like I did. :) they turn out just fine! the instructions from the tutorials are only ONE way of doing things too.  I changed it up a little on a few and ended up taking them all apart like the zippered pj's.  I did them more like the onesie tutorial and took the sleeves off.  I think they turned out darling, but now I think i'm all doll clothes-ed out for a while.  it's a lot of tedious stuff. 

        Another thing I did for the first time today was "shrink a T-shirt."  :) My brother in law gave me a shirt when we saw them last. It was an XL and I usually wear a M in mens t-shirts.  So, I took one of my favorite fitting shirts and laid it on top.  I ended up cutting the sleeves off  and fitting them like the other shirt and traced the outline of the shirt that fits onto the big shirt.  I pinned it all over, sewed it up with a knit stitch and hemmed the bottom.  I pinned the sleeves in place and stitched them in place too. it's like you never knew it was a different shirt!!! :) this one does fit a little tighter though, I think it's different thickness shirt. Oh well! :)