

I'm half tempted to say "don't try this at home!" The reason this skirt was such a headache is because I used my seam ripper more in two days working on this than I have all year on every other project combined!!!! I wanted to throw it outside and lock the door a few times. it was a nightmare!!!
Before I started I read a few blogs explaining how to do it and some left me kind of confused because I tried to follow their exact measurements and things. It just wasn't working. I ended up winging it and paid for it for two days. grr.
IF I were to ever do this skirt again, I would do these measurements:
- make each strip 4x78
(for a 3 year old- if it is a bigger child do about 2 1/2 times the width)
- space them about 1 1/2" apart
- The underskirt is still a mystery to me. It needs to be almost more of an A line. I'd go 4 inches maybe bigger than the waist and flare out a little from there.
I ended up using an old tshirt for the underskirt and sewed them all to it, but it would be almost easier to make the underskirt in strips and then sew the strips together. I don't know how many times I had to stop, turn it over and see the underskirt kept sneaking up under the needle where it wasn't supposed to be and I had to undo it all and start over. so annoying!!!

- cut your strips and sew them right sides together on the ends. I just ended up buying 1/4 yards of fabric and tearing the fabric every 4 inches once I straightened the fabric out. If you buy fat quarters you will have to sew many smaller strips together and it will take longer and be more confusing to get the ruffle spread out evenly.
- once fabric is sewn together iron over the edge 1/4" and repeat. sew it down along the edge.


- Baste along the other edge. stop about 1/4 of the way along and cut your threads long, start from there again. do that the whole way around.
- Pin your piece on your underskirt in fourths. centering the side seams and middle where you should have stopped and started a new baste line. Pull your threads to ruffle each section and spread it evenly. pin in place. do your first ruffle right along the bottom.

you can see in the picture at the top I made a casing for the elastic already but I'm not 100% sure it was a good idea or not. I ended up moving it down later anyway. I should have waited.
- once it is all sewn down, zig zag the raw edges down and flip ruffle down. I like my ruffles to lay down a bit and not stick out to show the underskirt so bad, so I top stitched the ruffle.
I did 5 ruffles and added a lining to mine so you wouldn't see the ugly stitching underneath.

It was all a miserable experience and I know there has to be an easier way to make this skirt. It doesn't help that I'm tired, and I can't sew like I used to anymore. I have to stop to nurse a baby, change diapers, snuggle, make meals. I might have to think more on this skirt and figure out a way to make this look awesome.
I spaced my ruffles out every 2 inches or so and it was too long, so I sewed them closer at one point and it looked adorable!! only problem is I put in on her and it looked like a mini skirt. I couldn't get the spacing right and it still bothers me. I cut it all apart after that and sewed on strips to sew it together and it ended up spaced like It did to start with. AAAAHHHHA!!! SO, I took a needle and thread and ended up taking up a few ruffles by hand to make it a little shorter. now it is at about the knee and it still doesn't look quite as cute as I'd hoped. OH WELL!!!! I can't take anymore of this skirt!

I added a cute bow to the back inside so she would know which way to put it on.

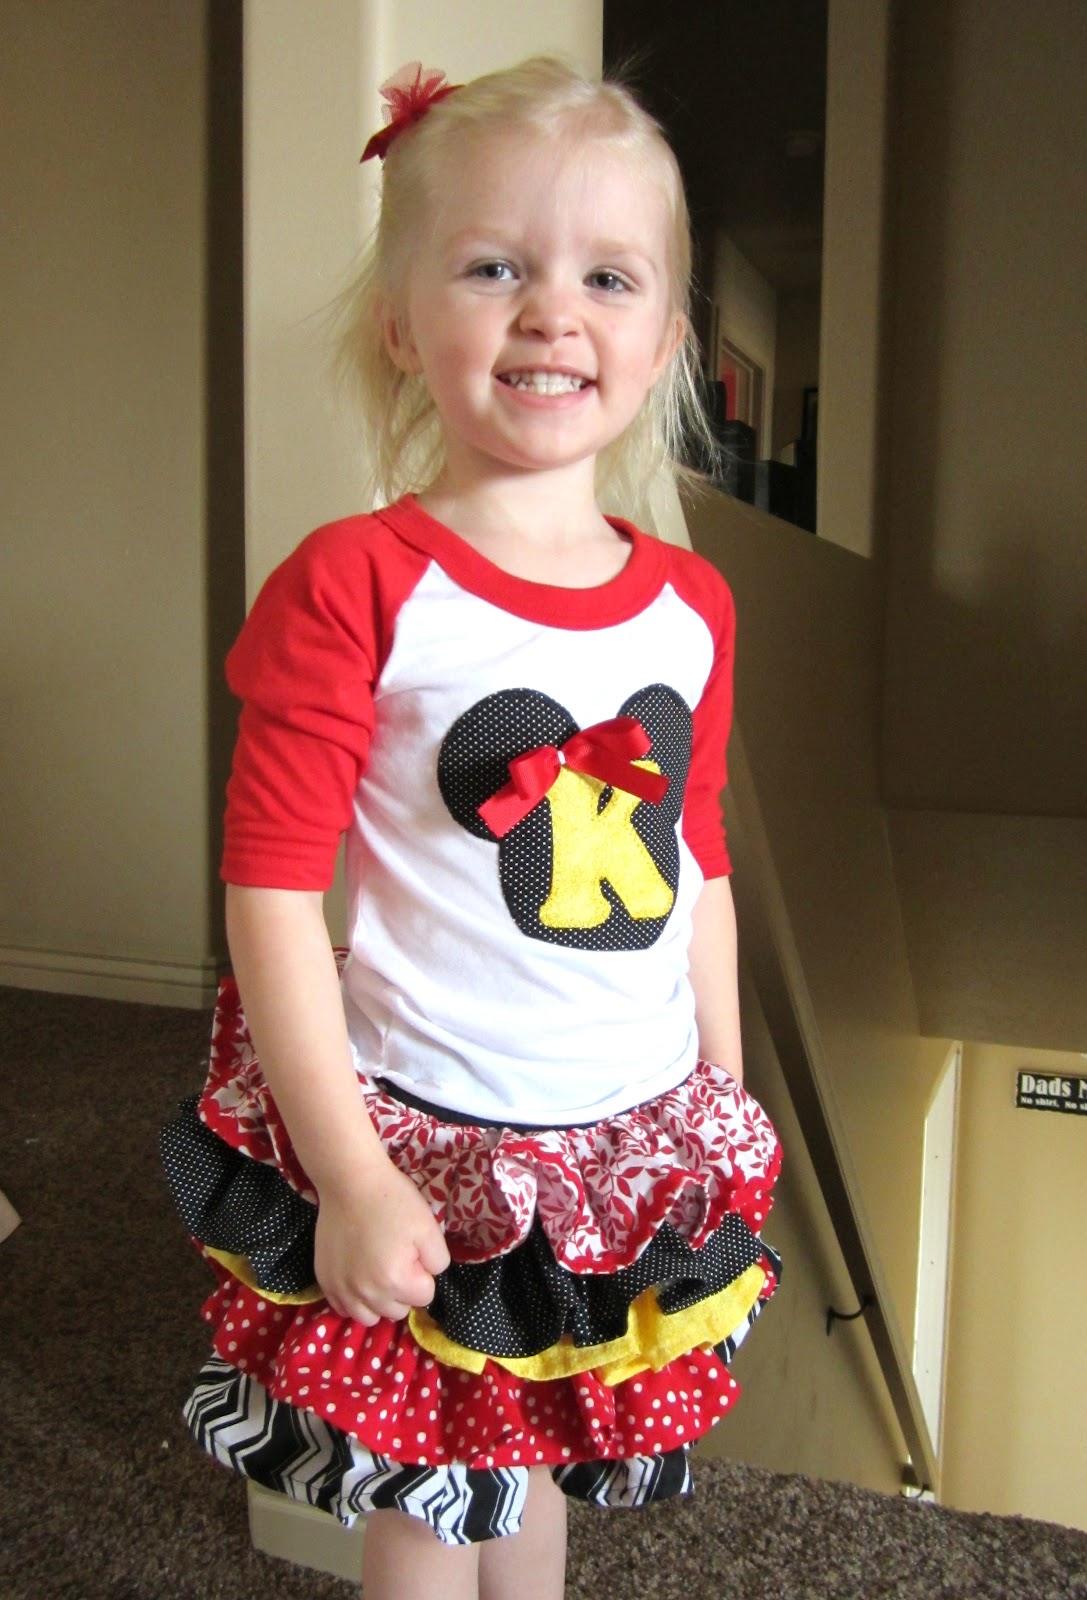
and I made a diaper cover. Ok, I bought some blanks online from ebay because making them is a pain. and I never have the extra fabric to make one. I did applique on the Minnie Mouse head and bow. (I bought 6 blanks in different sizes for 10.00 including shipping. People charge 12.00-14.00 for one just like this on etsy)

I wish I would have made the skirt more of an A line like I mentioned earlier because I had to pull a bit to get the skirt up high enough to even see the applique. sigh.
I found a baseball shirt and did a cute applique on it also. It reminded me of when I was a kid. Shirts "like" this, only not as cute, were really popular. :) This shirt however was way too big, so the first thing I had to do was take it in and make it fit her. another extra thing I had not intended on.


If you can see, I added a ric rac trim on the top ruffle to make the red pop more.
Even though I have some SERIOUS regrets with this skirt, it turned out cute enough that she likes it and she could wear it in public and I won't be embarrassed. :)
This is supposed to be a birthday gift for her, but with all the trying on the skirt and stuff, I don't know if I can wait. she has already seen it right? not like it would really be a secret.
I have said it before, but I feel all I do is copy other people. I see ideas I like and think I can make that!!! I found this one here:
it is $50.00 for the whole outfit, and after everything I just went though, it would have been WAY worth it to just buy one. :) If I had a surger, and a new sewing machine that had a ruffler foot this would have been cake. but I don't, so I make due. It like those new appliance commercials for LG or whatever that say is it a 20 min faster wash cycle or a 20 min laugh cycle or something. talking about how you can spend more time with your kids rather than doing laundry or dishes. Kinda the same concept for me. Yeah, she doesn't NEED clothes like this, like you would NEED to cook and do laundry, but you get the idea.
Do you only use your sewing machine when you attach their initials to the outfit? Is that hard?
ReplyDeleteI do use my sewing machine! It was a little interesting when I first started doing it, but I found an applique foot for my machine (it's clear and open in the middle so you can see what you are doing) that helped a lot!! You get stuff called heat and bond light and just iron it on first. check out this awesome tutorial! I just learned something from it too! http://sewlikemymom.com/applique-tutorial/
ReplyDelete